Microprinting
The concept of Microprinting as described by Tom Taylor as:
an experiment in physical activity streams and notification, using a repurposed receipt printer connected to the web.
Tom Taylor
Using this and the works of others as inspiration, I set about making my own Internet connected printer.
Before starting the project, I hadn’t had any previous experience of building electronic circuits, and it had been over 10 years since I had last picked up a soldering iron. Unperturbed, I set out and acquired everything I needed for the project:
- An old receipt printer - I have a Citizen CBM-231 from ebay
- An Arduino board, bread board and jump wires (from Cool Components)
- Arduino Ethernet shield (also from Cool Components)
- A MAX233 Chip and serial plug (from Maplins)
The serial output of the Arduino board isn’t natively compatible with the printer - you need to run the signal through the MAX233 chip to transform the output to the correct voltage.
Hooking Up The Printer
Before turning on the soldering iron and start connecting wires, it would be a good idea to study the manuals for the printer and MAX233 chip. I did not and subsequently spent a couple of hours achieving very little before finally get the printer to spark into life.
The first thing I needed to find out was the numbering on the pins of the MAX233 chip - a quick bit of searching revealed that pin 1 is next to the corner with the dot in. Using the bread board to create a quick circuit, wiring in the chip was quite easy, although the finished article looks quite complicated:
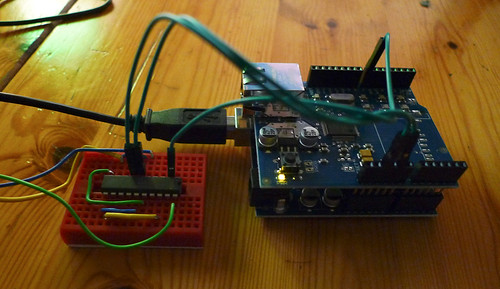
After plugging in the board, the printer started to emit a constant stream of question marks (I’m not the first one this happened to). Going back and checking the wires produced the desired result, and I was able to print my basic “Hello World” test program.
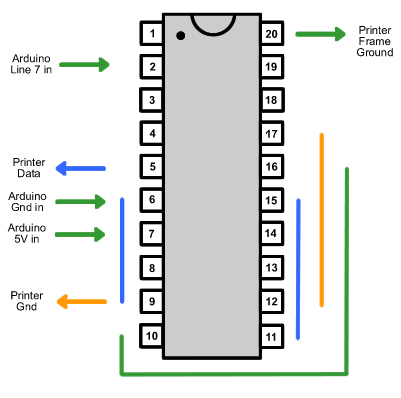
In order to help anyone else, I’ve made a completely non technical diagram of the circuit I’m using:
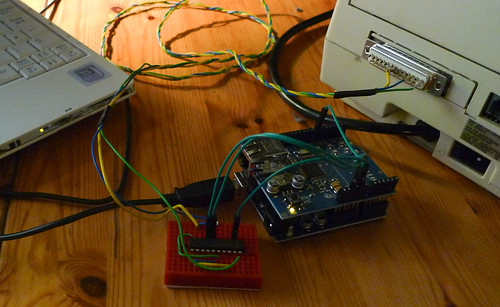
When connected to the laptop, the Arduino is powered through the USB cable. In order to untether
the printer from the laptop, you can connect a power adapter directly to the Arduino board itself.
I’m using a spare iPhone power adapter and USB cable which seems to work quite well too.
Programming The Arduino
Programming the Arduino is a simple matter of downloading the open source IDE
and writing a “sketch” - a small program to run on the board independently of the connected computer.
When plugging in the board, it appears on the host computer as an additional serial port. Once you’ve
finished writing your sketch, you can compile and upload it directly to the board from the IDE.
I wrote a “Hello World” test program based upon Roo Reynolds code just to check the board was wired up correctly. Once this was up and running, Tom Taylor has a version that includes Ethernet networking to accept data using HTTP GET requests.
I wrote a simple queue in .NET Monorail that spools the contents of a text file to the printer. Several command
line programs append data to this text file to populate the queue withincoming streams from email and RSS feeds.
The printer calls this queue every minute and prints the contents.
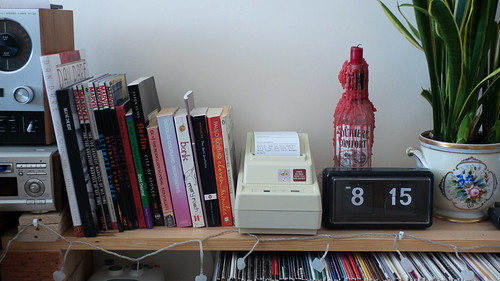
The Finished Result
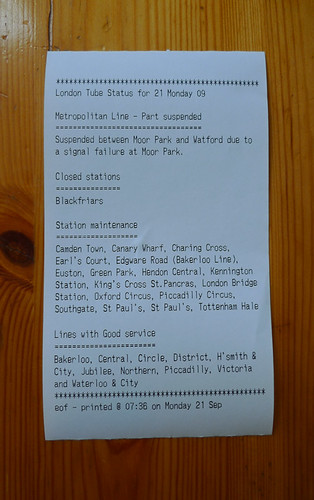
The printer is currently pooling information from the following sources:
- Google Mail accounts
- Weather Reports from the BBC
- Tube reports from TFL
- Google Analytics statistics
- RSS Feeds
I’m hoping to expand the incoming information sources over time.